Facial Keypoint Detection
Using a CNN to detect facial keypoints and use them in applications with face filters
Face filters, which overlay facial photographs with funny objects, have become commonplace. They are used extensively in social media applications. The technique behind this filter application is facial keypoint (or “keypoints”) detection.
This article explores facial keypoint detection and describes how to develop it into a model that runs on the Snapdragon® mobile platform.

Output of application with face filters
Facial keypoints
Facial keypoints are the vital areas in the face from which a person’s facial expressions — and, therefore, emotions — can be evaluated. They play an important role in developing real-time applications for detecting drowsiness, analyzing biometrics and reading a person’s emotions.
The figure below shows the arrangement of points matching the human face.
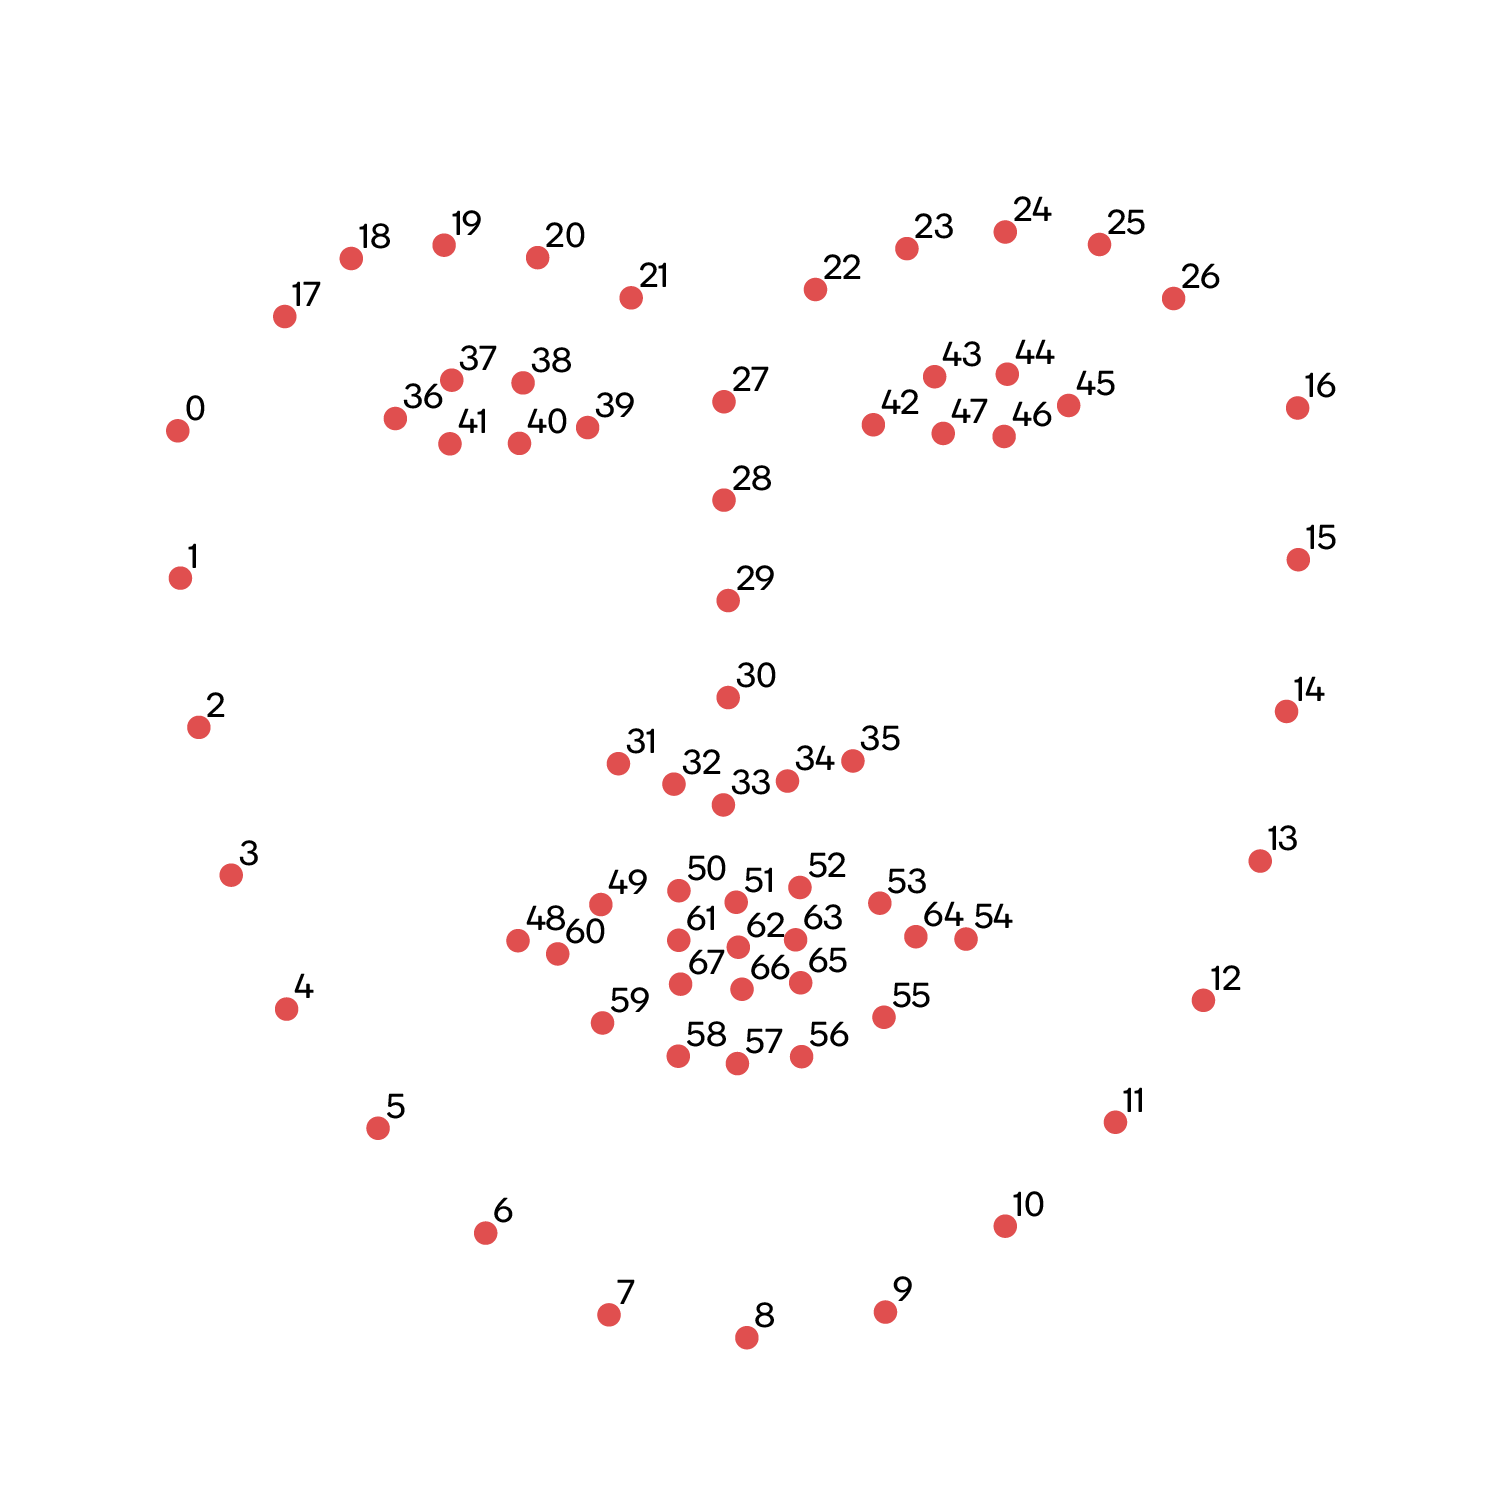
Facial keypoints
Detecting facial keypoints using a deep convolutional neural network (CNN)
Based on the project at https://github.com/yinguobing/cnn-facial-landmark, the following describes how to train a machine learning model for detecting facial keypoints.
The model is built with TensorFlow. The data set used for training contains images of the human face; for each image, the data set includes the co-ordinates for all 68 of the keypoints shown above. The model has been trained for 500 epochs, resulting in a frozen graph file (.pb).
To run the model on a mobile device powered by Snapdragon, the model must first be converted using the Qualcomm® Neural Processing SDK for AI.
1. Convert the model to DLC
First, follow the Getting Started instructions and ensure that the SDK is correctly installed and configured.
The SDK includes an snpe-tensorflow-to-dlc conversion tool. Run it from the directory containing the .pb file. Use the following input arguments:
- Input Layer name: input_to_float
- Input Shape: 1, 128, 128, 3
- Output Layer name: logits/BiasAdd
That is:
$ snpe-tensorflow-to-dlc –-graph -i input_to_float 1, 128, 128, 3 --out_node logits/BiasAdd --dlc key_points.dlc The resulting key_points.dlc file is in the deep learning container format (DLC) required by the SDK.
2. Convert test images
The following Python code converts images into a raw format supported by the SDK:
import argparseimport numpy as npimport cv2from os import listdirfrom os.path import isfile, joinif __name__ == '__main__': parser = argparse.ArgumentParser() parser.add_argument( '--in_path', type=str, default='./data/input/', help='Path to input images folder.'  ) parser.add_argument( '--out_path', type=str, default='./data/raw-images/', help='Path to raw images folder.'   args = parser.parse_args() myInputPath = args.in_path myOutputPath = args.out_path allImages = [f for f in listdir(myInputPath) if isfile(join(myInputPath, f))] raw_images = [] for i in allImages: ifile = myInputPath+i ofile = myOutputPath + ifile.split('/')[-1].split('.')[0] + '.raw' raw_images.append(ofile.split('/')[-1]) img = cv2.imread(ifile, cv2.IMREAD_COLOR) img = cv2.resize(img, (128, 128)) #print (img) np_arr = np.array(img).astype('float32') np_arr.tofile(ofile) with open(myOutputPath+"raw-file.txt", "w") as myfile: for rimg in raw_images: myfile.write(myOutputPath+rimg+'\n') print ('conversion successfull... \n{} images converted in rawimages'.format(len(allImages)))3. Running inference on Ubuntu using the Qualcomm Neural Processing SDK for AI
Using the .dlc file and snpe-net-run, test the model against images containing the human face. The following command generates predicted output for every input image and stores it as a raw text file.
$ snpe-net-run --container key_points.dlc --input_list ./data/raw-images/raw-file.txt4. Plotting output values onto input images
The python script below plots the predicted output values onto the input images. It requires two parameters:
- -i — path to input image
- -o — path to predicted raw output file
import numpy as npimport cv2import osimport argparsefrom scipy.spatial import distance as distdef plot_landmarks(raw_in, org_img_path): org_img = cv2.imread(org_img_path, cv2.IMREAD_COLOR) org_img = cv2.resize(org_img, (128, 128)) arr = np.fromfile(open(raw_in, 'r'), dtype="float32") cp = [] for idx, i in enumerate(arr): ind = idx * 2 cv2.line (org_img, (int(arr[ind]*128), int(arr[ind+1]*128)), (int(arr[ind]*128)+1, int(arr[ind+1]*128)+1), (0, 0,255), 2) cv2.imshow('img', org_img) cv2.waitKey(0)def main(): parser = argparse.ArgumentParser(description='Display eye aspect ratio results.') parser.add_argument('-o',"--output_raw", required=True, type=str,) parser.add_argument('-i', '--input_img', type=str , required=True) args = parser.parse_args() plot_landmarks(args.output_raw, args.input_img)if __name__ == '__main__': main() The results of the script on three images are shown below:
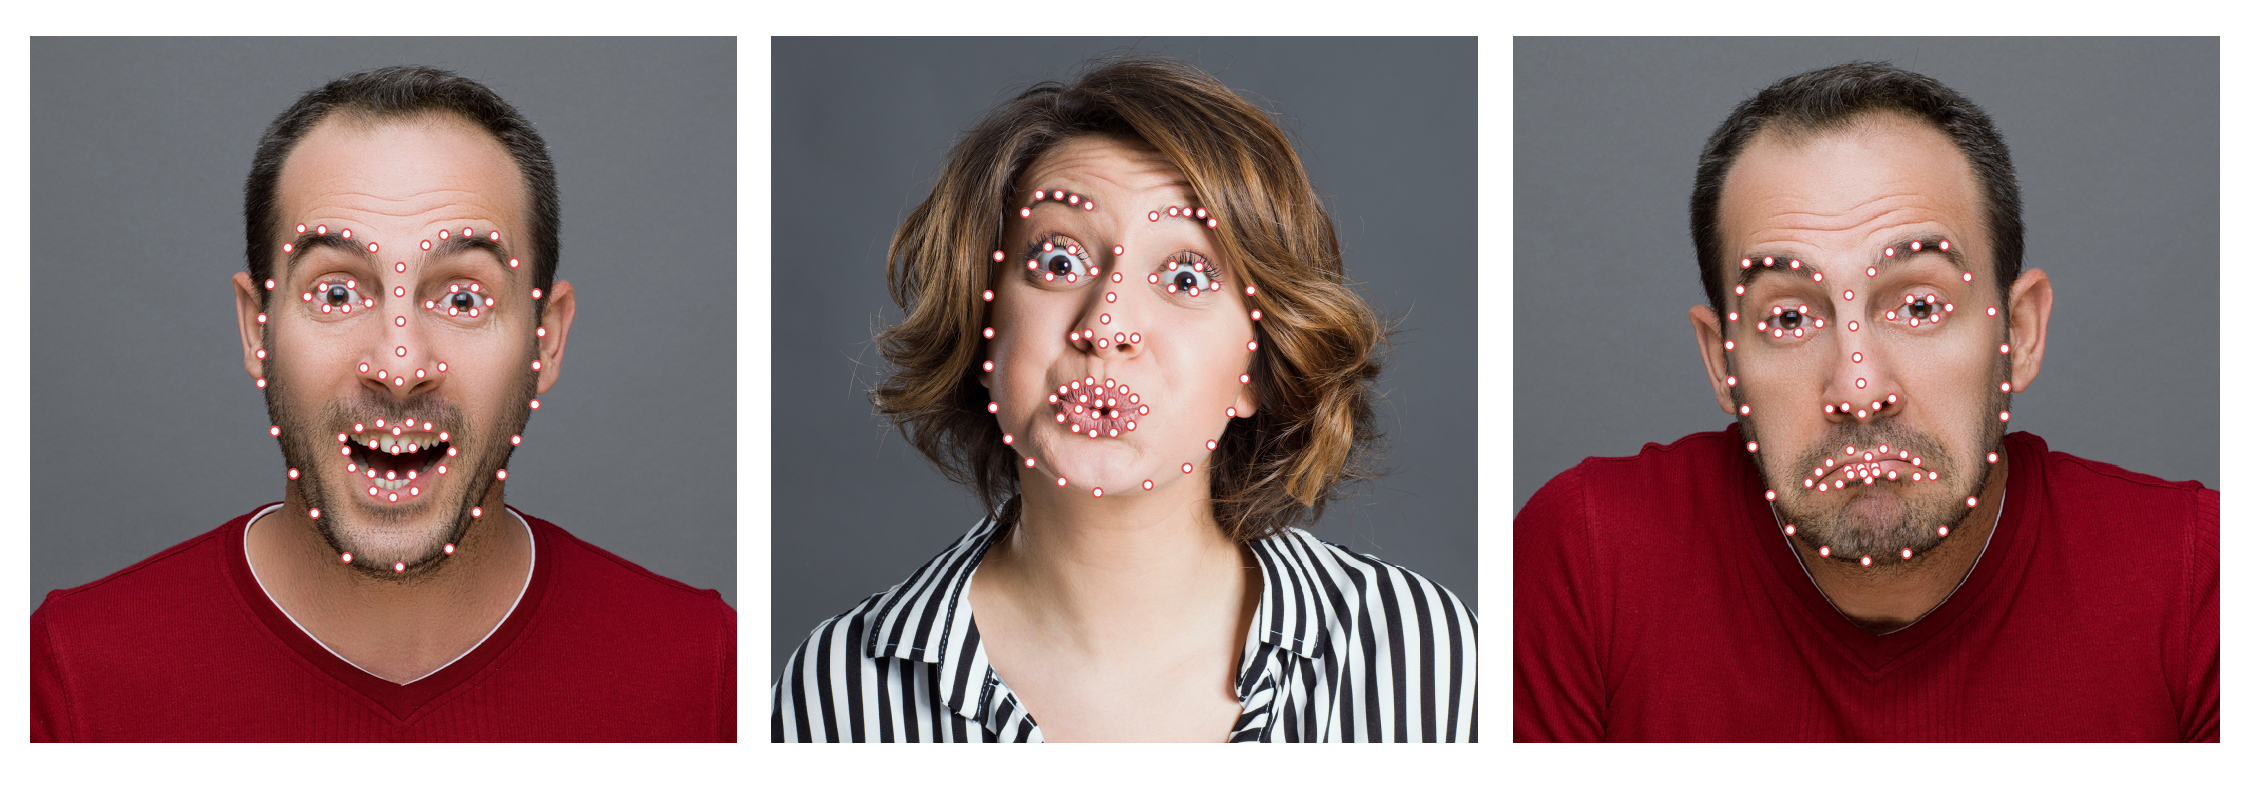
Predicted output from the snpe-net-run tool
Snapdragon and Qualcomm Neural Processing SDK are products of Qualcomm Technologies, Inc. and/or its subsidiaries.