Setting up the project using the Android Studio IDE and required SDKs
How to build and run a sample AI application from Android Studio
Setting up the AI Android project
The steps below are designed to prepare you to develop an AI-based Android mobile app using Android Studio.
First, follow the “Install Android Studio” guide on the Android developer site. It will walk you through downloading and installing the Android Studio integrated development environment (IDE) and required software development kits (SDKs).
Building and running a sample AI application from Android Studio
Download the sample project source code as a .zip file and extract it. The Android examples are in the folder tensorflow/examples/android. Follow all necessary steps given in Readme.md. Samples are provided by TensorFlow. Trained models are already part of the Android applications, and models are downloaded to the application’s /assets folder.
In Android Studio, select File -> New -> Import project. Navigate to tensorflow-master -> tensorflow -> examples -> android, then click OK button.
Once the process of building gradle is complete, Android Studio automatically checks for any build errors. Ensure the build is successful before you continue.
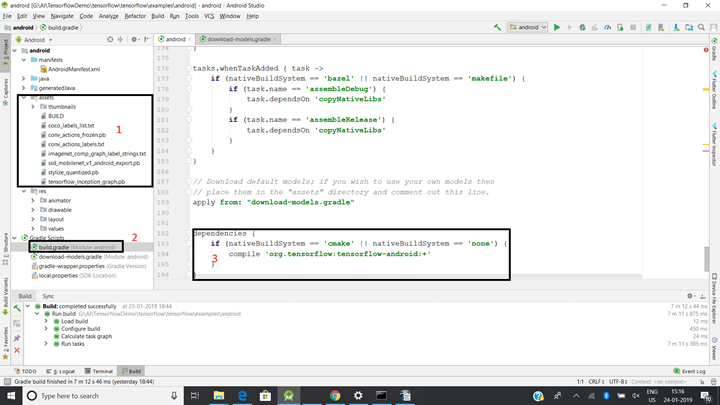
In this project, the trained model files in .pb format reside in the /assets folder (1 in the image). Note that models need to conform to the framework you are using. In the case of Tensorflow, the model should be in .pb format; for the Qualcomm® Neural Processing SDK, the model should be in .dlc (Deep Learning Container) format.
Note the following details in the project:
- a. build.gradle (2 in the image) includes a dependency block (3 in the image) for compiling the TensorFlow library: compile 'org.tensorflow:tensorflow-android:+'
- b. manifest.xml should have camera permission defined: < uses-permission android:name="android.permission.CAMERA"/>
- c. A code block in the application receives the results of image processing:
protected void processImage() { rgbFrameBitmap.setPixels(getRgbBytes(), 0, previewWidth, 0, 0, previewWidth, previewHeight); final Canvas canvas = new Canvas(croppedBitmap); canvas.drawBitmap(rgbFrameBitmap, frameToCropTransform, null); // For examining the actual TF input. if (SAVE_PREVIEW_BITMAP) { ImageUtils.saveBitmap(croppedBitmap); } runInBackground( new Runnable() { @Override public void run() { final long startTime = SystemClock.uptimeMillis(); final List <Classifier.Recognition> results = classifier.recognizeImage(croppedBitmap); lastProcessingTimeMs = SystemClock.uptimeMillis() - startTime; LOGGER.i("Detect: %s", results +"---"+lastProcessingTimeMs); cropCopyBitmap = Bitmap.createBitmap(croppedBitmap); if (resultsView == null) { resultsView = (ResultsView) findViewById(R.id.results); } resultsView.setResults(results); requestRender(); readyForNextImage(); } }); }Build and run the app.
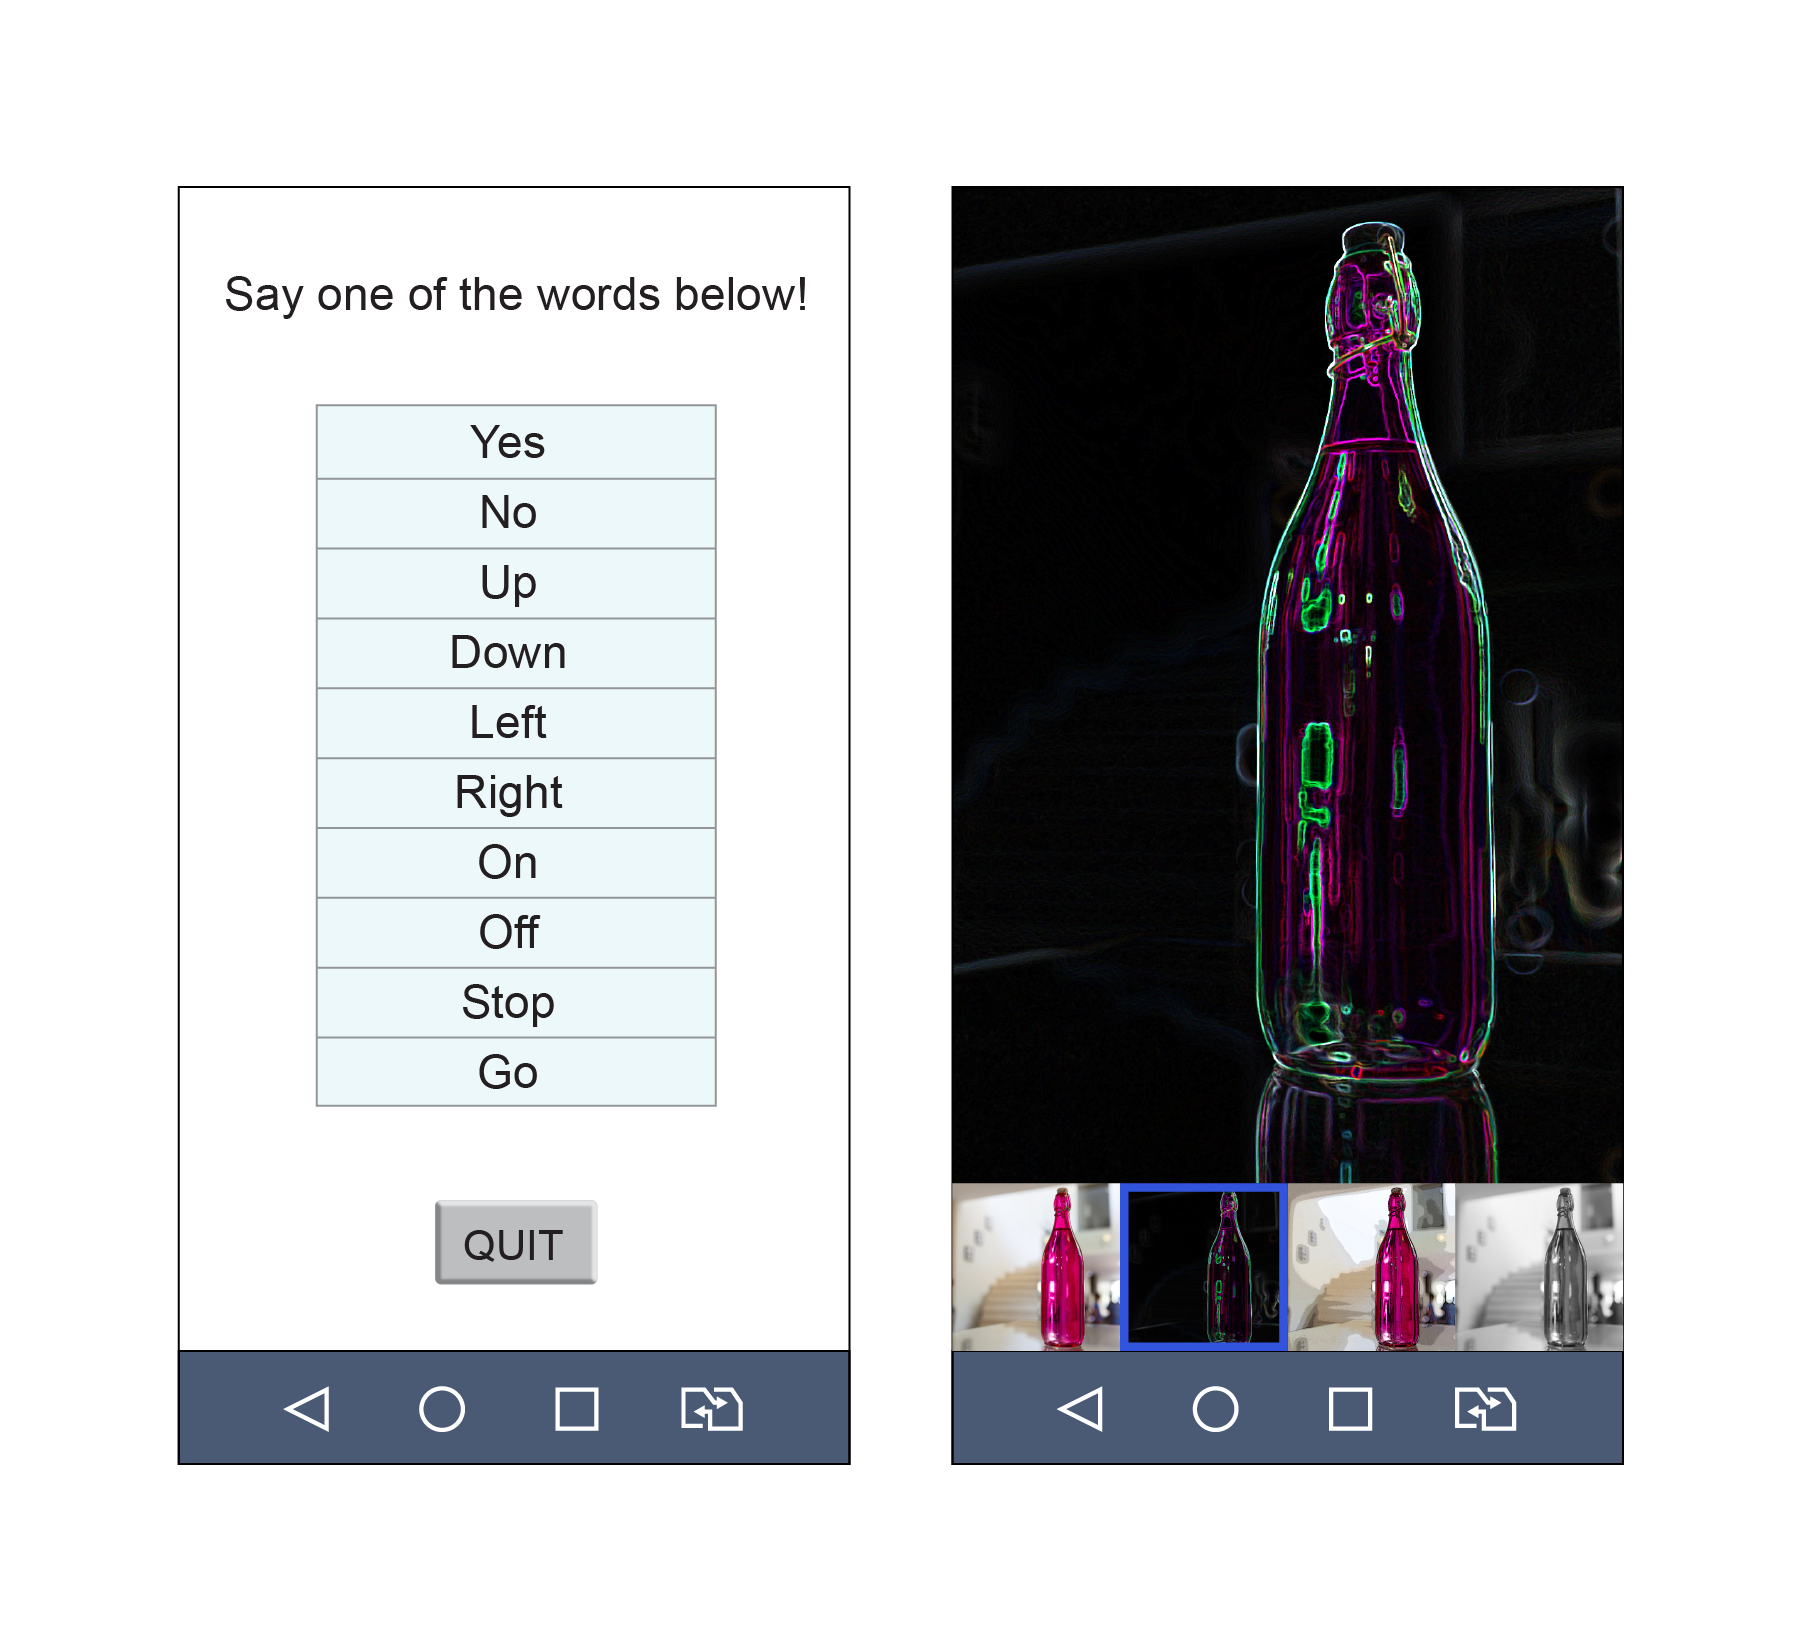
This sample app has four different launchers available in the device as separate applications. The user can launch each of them explicitly. The four applications are “TF Classify”, “TF Detect”, “TF Sylize” and “TF Speech”.
<activity android:name="org.tensorflow.demo.ClassifierActivity"
 android:screenOrientation="portrait"
 android:label="@string/activity_name_classification">
 <intent-filter>
 <action android:name="android.intent.action.MAIN" />
 <category android:name="android.intent.category.LAUNCHER" />
 <category android:name="android.intent.category.LEANBACK_LAUNCHER" />
 </intent-filter >
 </activity >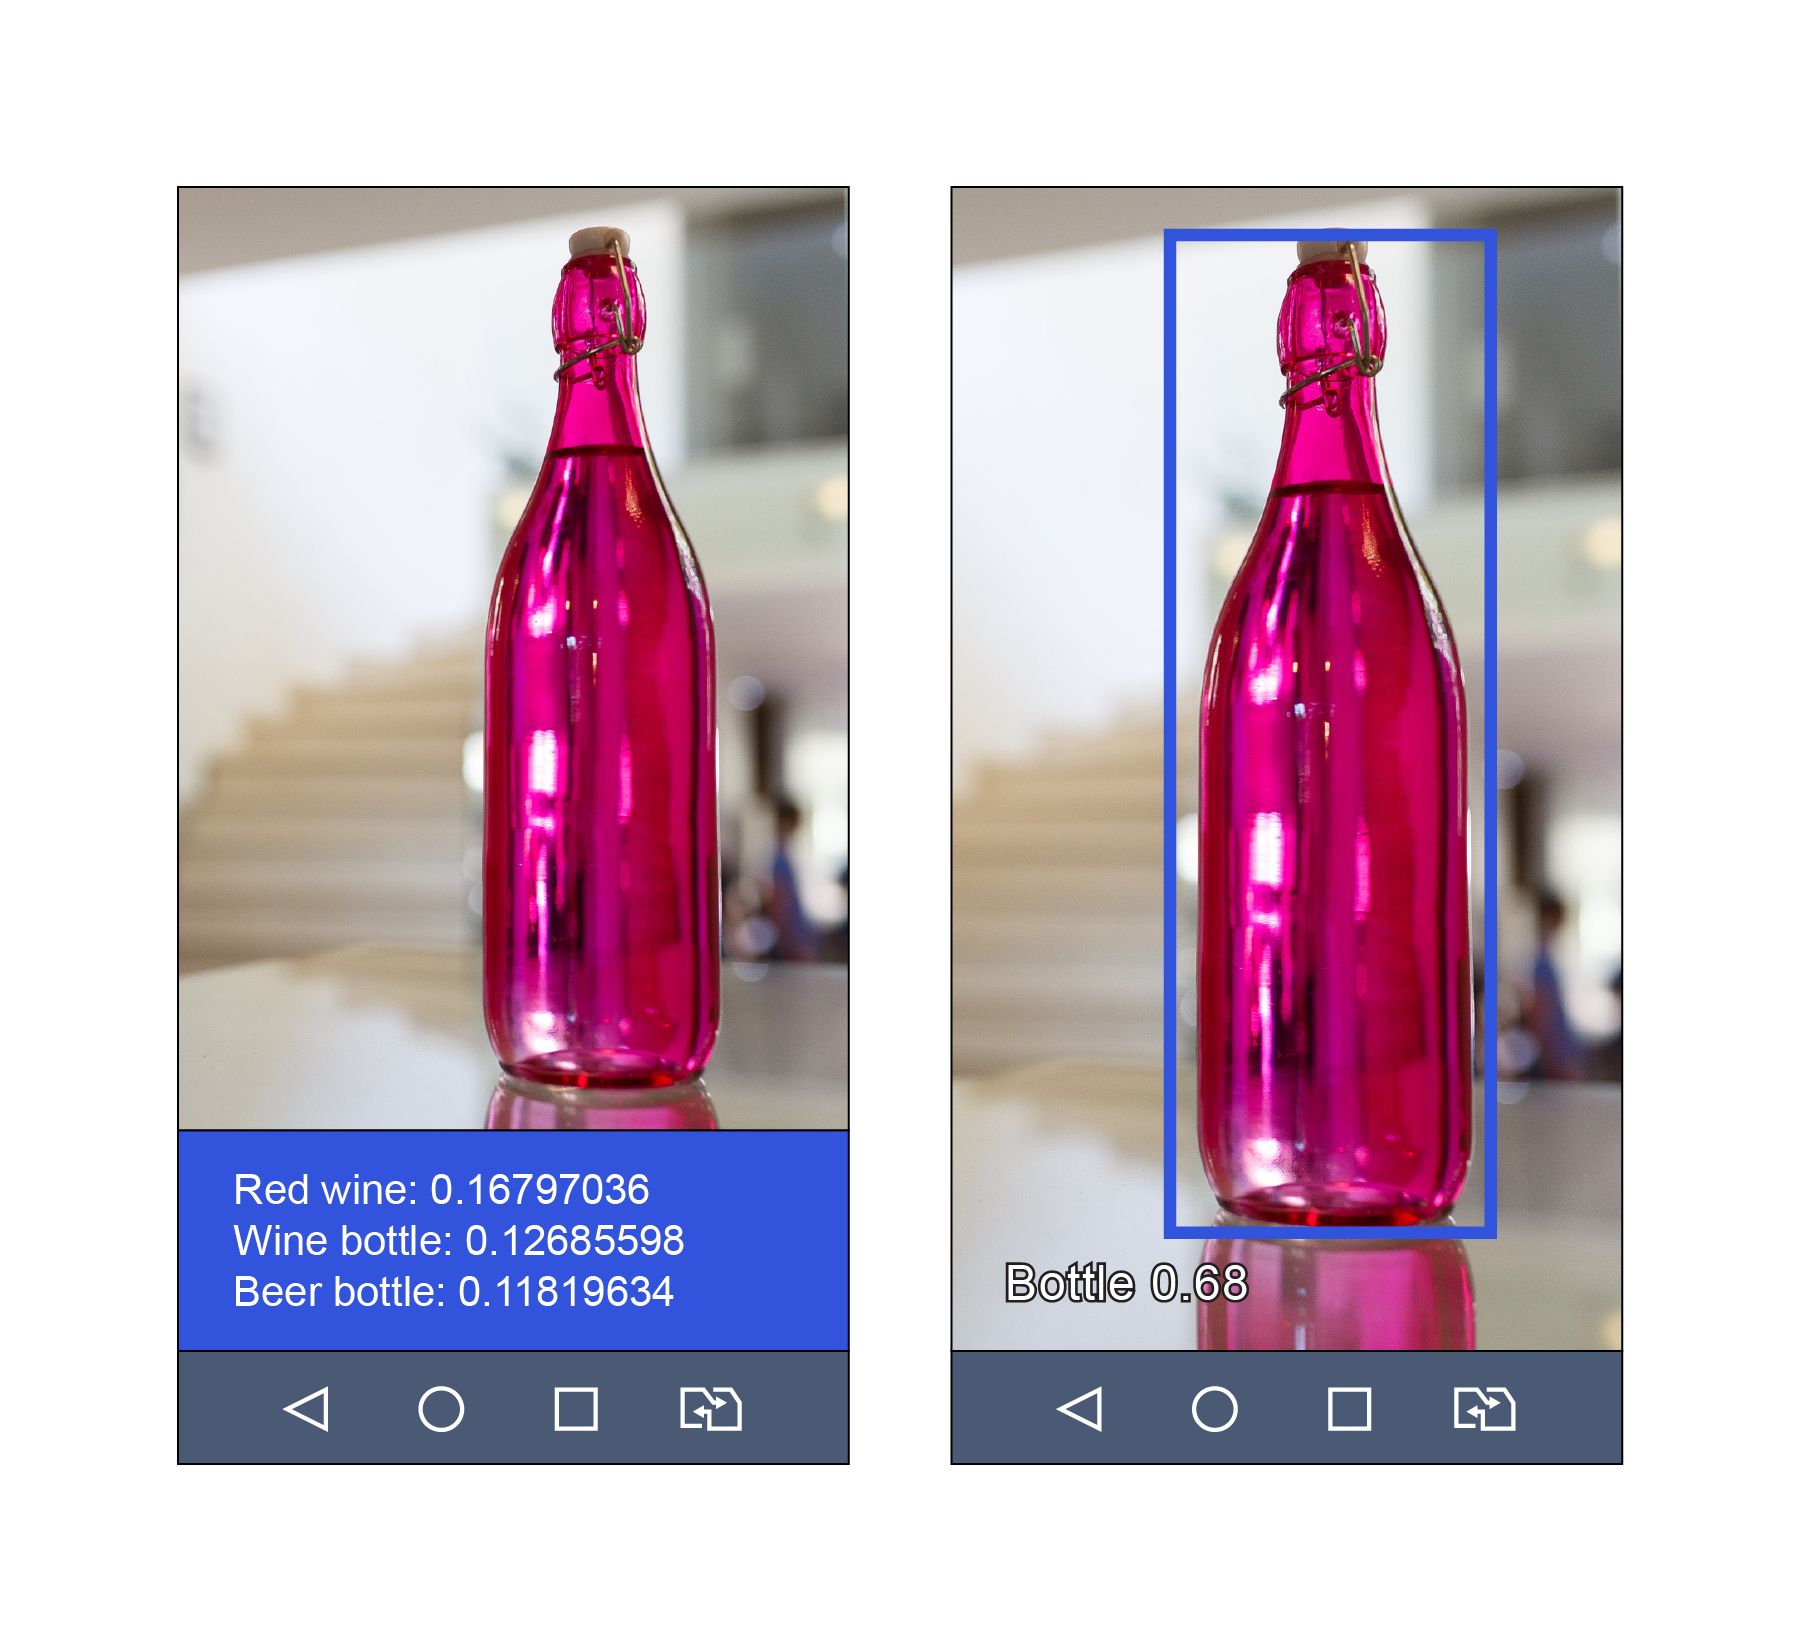
After running the AI application, the next step is to benchmark relative performance between Qualcomm(R) Neural Processing Engine (NP and TensorFlow on Android.
Qualcomm Neural Processing SDK and Qualcomm Neural Processing Engine are products of Qualcomm Technologies, Inc. and/or its subsidiaries.