Overview
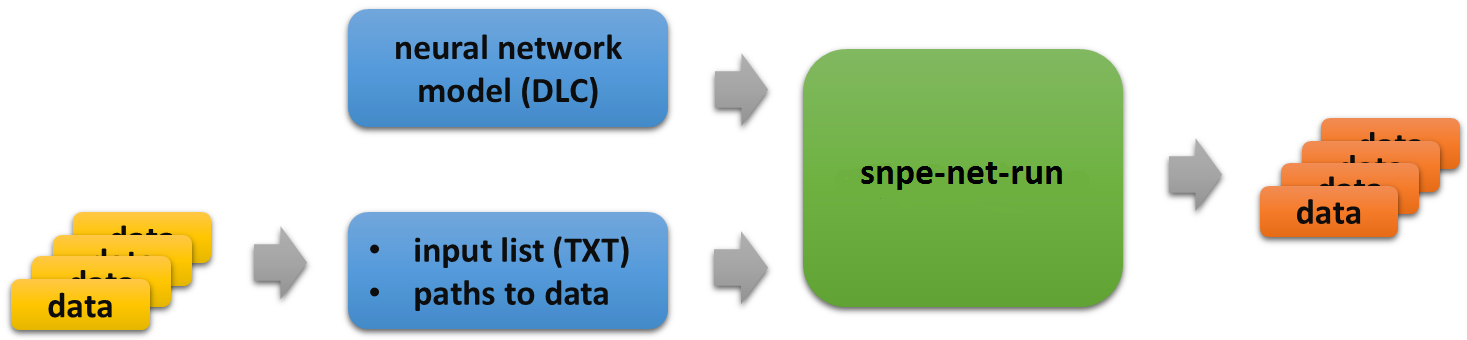
The example C++ application in this tutorial is called snpe-net-run. It is a command line executable that executes a neural network using SNPE SDK APIs.
The required arguments to snpe-net-run are:
- A neural network model in the DLC file format
- An input list file with paths to the input data.
Optional arguments to snpe-net-run are:
- Choice of GPU or DSP runtime (default is CPU)
- Output directory (default is ./output)
- Show help description
snpe-net-run creates and populates an output directory with the results of executing the neural network on the input data.
The SNPE SDK provides Linux and Android binaries of snpe-net-run under
- $SNPE_ROOT/bin/x86_64-linux-clang
- $SNPE_ROOT/bin/arm-android-clang6.0
- $SNPE_ROOT/bin/aarch64-android-clang6.0
- $SNPE_ROOT/bin/aarch64-oe-linux-gcc6.4
- $SNPE_ROOT/bin/arm-oe-linux-gcc6.4hf
Prerequisites
- The SNPE SDK has been set up following the SNPE Setup chapter.
- The Tutorials Setup has been completed.
- Caffe is installed (see Caffe & Caffe2 Setup)
Introduction
The AlexNet imagenet classification model is trained to classify images with 1000 labels. The examples below shows the steps required to execute a pretrained AlexNet model with snpe-net-run to classify a set of sample images.
Run on Linux Host
Go to the base location for the model and run snpe-net-run
cd $SNPE_ROOT/models/alexnet
snpe-net-run --container dlc/bvlc_alexnet.dlc --input_list data/cropped/raw_list.txt
After snpe-net-run completes, verify that the results are populated in the $SNPE_ROOT/models/alexnet/output directory. There should be one or more .log files and several Result_X directories, each containing a prob.raw file.
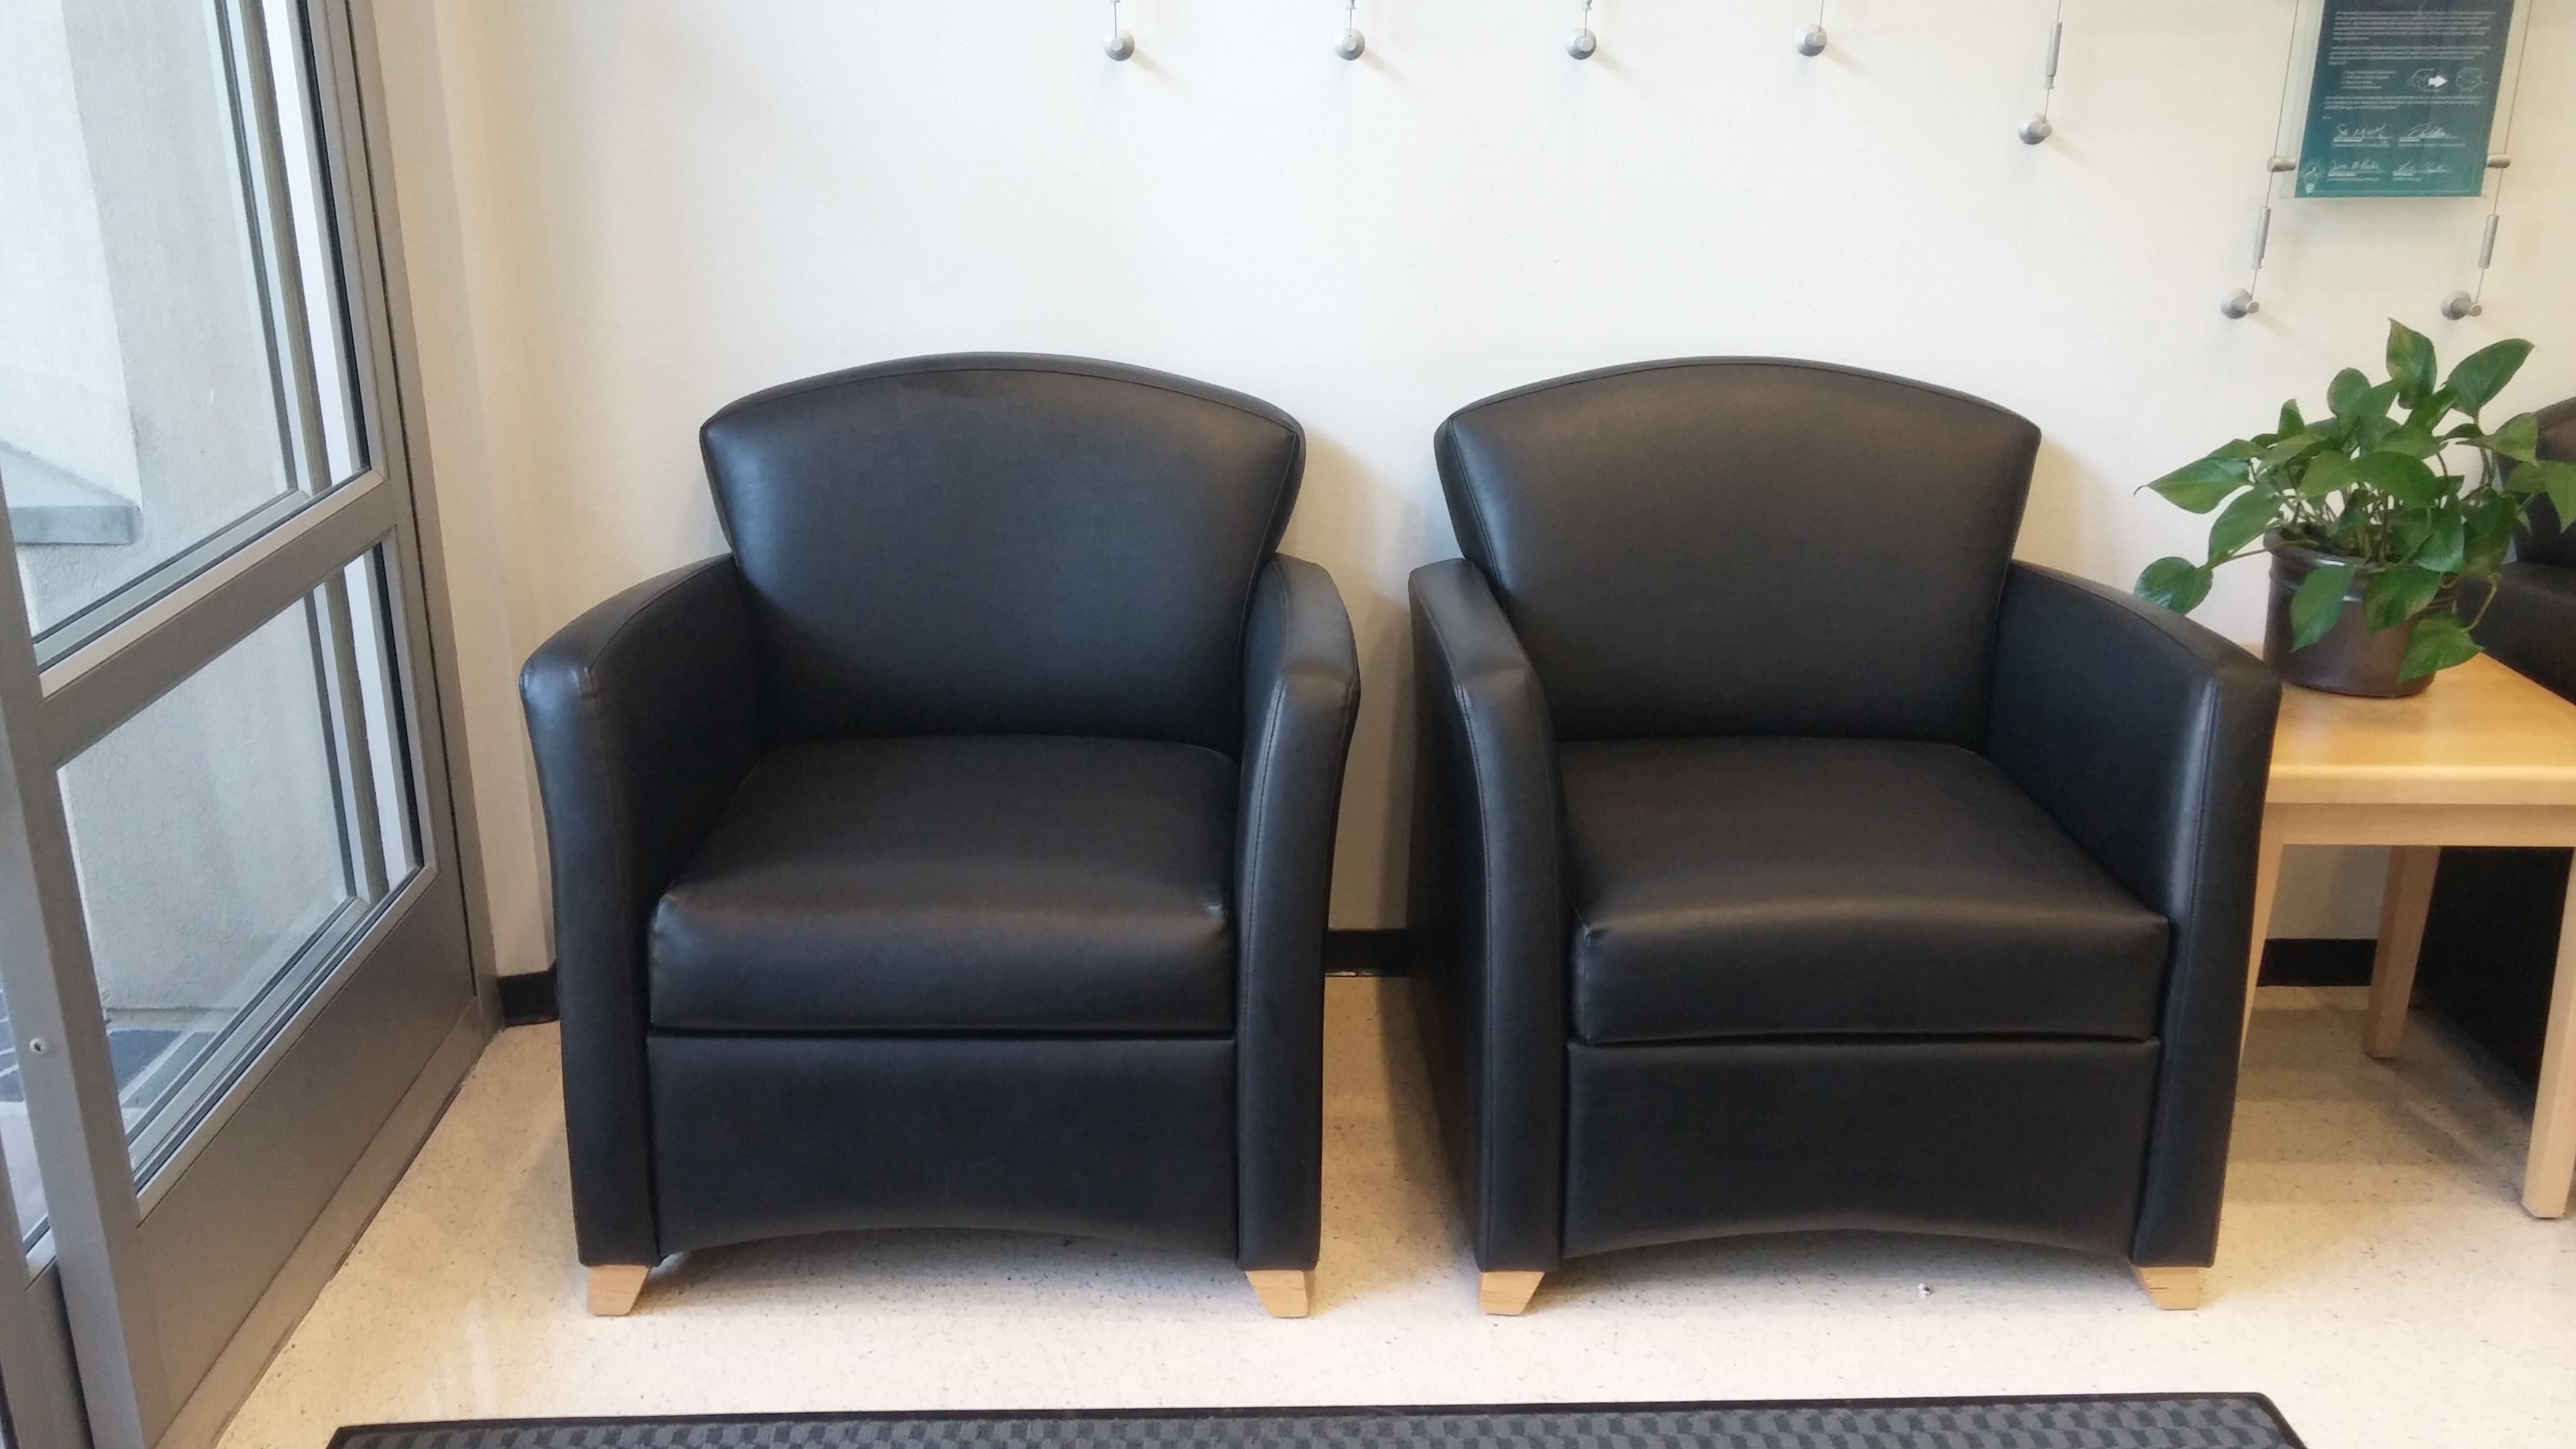
One of the inputs is data/cropped/chairs.raw and it was created from data/cropped/chairs.jpg which looks like the following.
With this input file, snpe-net-run created the output file $SNPE_ROOT/models/alexnet/output/Result_0/prob.raw. It holds the output tensor data of 1000 probabilities for the 1000 categories. The element with the highest value represents the top classification. We can use a python script to interpret the classification results as follows.
python3 $SNPE_ROOT/models/alexnet/scripts/show_alexnet_classifications.py -i data/cropped/raw_list.txt \
                                                                         -o output/ \
                                                                         -l data/ilsvrc_2012_labels.txt
The output should look like the following, showing classification results for all the images.
Classification results
<input_files_dir>/trash_bin.raw     0.949348 412 ashcan, trash can, garbage can,
                                                 wastebin, ash bin, ash-bin, ashbin,
                                                 dustbin, trash barrel, trash bin

<input_files_dir>/plastic_cup.raw   0.749104 647 measuring cup
<input_files_dir>/chairs.raw        0.365685 831 studio couch, day bed
<input_files_dir>/notice_sign.raw   0.722708 458 brass, memorial tablet, plaque
Note: The <input_files_dir> above maps to a path such as /local/mnt/workspace/XXX/snpe-x.y.z/models/alexnet/data/cropped/
The second output shows the image was classified as "measuring cup" (index 647 of the labels) with a probability of 0.749104. Look at the rest of the output to see the model's classification on other images.
Binary data input
Note that the AlexNet image classification model does not accept jpg files as input. The model expects its input tensor dimension to be 227x227x3 as a float array, see Input Images for more detail. The scripts/setup_alexnet.py script performed a jpg to binary data conversion by calling scripts/create_alexnet_raws.py. The scripts are an example of how jpg images can be preprocessed to generate input for the AlexNet model.
Usage for create_alexnet_raws.py
Please put your *.jpg files to a folder in advance. For instance, input_pictures.
cd $SNPE_ROOT/models/alexnet
python scripts/create_alexnet_raws.py -i scripts/input_pictures \
                                      -o scripts/output \
                                      -m data/ilsvrc_2012_mean.npy
Before execute snpe-net-run, please make sure a correct raw_list.txt corresponding to your new output folder.
Run on Android Target
Select target architecture
SNPE provides Android binaries for armeabi-v7a and arm64-v8a architectures. For each architecture, there binaries are compiled with clang6.0 using libc++ STL implementation. The following shows the commands to select the desired binaries.
# architecture: armeabi-v7a - compiler: clang - STL: libc++
export SNPE_TARGET_ARCH=arm-android-clang6.0
export SNPE_TARGET_STL=libc++_shared.so

# architecture: arm64-v8a - compiler: clang - STL: libc++
export SNPE_TARGET_ARCH=aarch64-android-clang6.0
export SNPE_TARGET_STL=libc++_shared.so
For simplicity, this tutorial sets the target binaries to arm-android-clang6.0, which use libc++_shared.so, for commands on host and on target.
Push binaries to target
Push SNPE libraries and the prebuilt snpe-net-run executable to /data/local/tmp/snpeexample on the Android target.
export SNPE_TARGET_ARCH=arm-android-clang6.0
export SNPE_TARGET_STL=libc++_shared.so

adb shell "mkdir -p /data/local/tmp/snpeexample/$SNPE_TARGET_ARCH/bin"
adb shell "mkdir -p /data/local/tmp/snpeexample/$SNPE_TARGET_ARCH/lib"
adb shell "mkdir -p /data/local/tmp/snpeexample/dsp/lib"

adb push $SNPE_ROOT/lib/$SNPE_TARGET_ARCH/$SNPE_TARGET_STL \
      /data/local/tmp/snpeexample/$SNPE_TARGET_ARCH/lib
adb push $SNPE_ROOT/lib/$SNPE_TARGET_ARCH/*.so \
      /data/local/tmp/snpeexample/$SNPE_TARGET_ARCH/lib
adb push $SNPE_ROOT/lib/dsp/*.so \
      /data/local/tmp/snpeexample/dsp/lib
adb push $SNPE_ROOT/bin/$SNPE_TARGET_ARCH/snpe-net-run \
      /data/local/tmp/snpeexample/$SNPE_TARGET_ARCH/bin
Set up enviroment variables
Set up the library path, the path variable, and the target architecture in adb shell to run the executable with the -h argument to see its description.
adb shell
export SNPE_TARGET_ARCH=arm-android-clang6.0
export LD_LIBRARY_PATH=$LD_LIBRARY_PATH:/data/local/tmp/snpeexample/$SNPE_TARGET_ARCH/lib
export PATH=$PATH:/data/local/tmp/snpeexample/$SNPE_TARGET_ARCH/bin
snpe-net-run -h
exit
Push model data to Android target
To execute the AlexNet classification model on your Android target follow these steps:
cd $SNPE_ROOT/models/alexnet
mkdir data/rawfiles && cp data/cropped/*.raw data/rawfiles/
adb shell "mkdir -p /data/local/tmp/alexnet"
adb push data/rawfiles /data/local/tmp/alexnet/cropped
adb push data/target_raw_list.txt /data/local/tmp/alexnet
adb push dlc/bvlc_alexnet.dlc /data/local/tmp/alexnet
rm -rf data/rawfiles
Note: It may take some time to push the AlexNet dlc file to your target.
Running on Android using CPU Runtime
Run the Android C++ executable with the following commands:
adb shell
export SNPE_TARGET_ARCH=arm-android-clang6.0
export LD_LIBRARY_PATH=$LD_LIBRARY_PATH:/data/local/tmp/snpeexample/$SNPE_TARGET_ARCH/lib
export PATH=$PATH:/data/local/tmp/snpeexample/$SNPE_TARGET_ARCH/bin
cd /data/local/tmp/alexnet
snpe-net-run --container bvlc_alexnet.dlc --input_list target_raw_list.txt
exit
The executable will create the results folder: /data/local/tmp/alexnet/output. To pull the output:
adb pull /data/local/tmp/alexnet/output output_android
Check the classification results by running the interpret python script.
python3 scripts/show_alexnet_classifications.py -i data/target_raw_list.txt -o output_android/ \
                                               -l data/ilsvrc_2012_labels.txt
The output should look like the following, showing classification results for all the images.
Classification results
cropped/trash_bin.raw     0.949346 412 ashcan, trash can, garbage can, wastebin, ash bin,
                                       ash-bin, ashbin, dustbin, trash barrel, trash bin
cropped/plastic_cup.raw   0.749105 647 measuring cup
cropped/chairs.raw        0.365684 831 studio couch, day bed
cropped/handicap_sign.raw 0.101762 919 street sign
cropped/notice_sign.raw   0.722704 458 brass, memorial tablet, plaque
Running on Android using GPU Runtime
Try running on an Android target with the --use_gpu option as follows. By default, the GPU runtime runs in GPU_FLOAT32_16_HYBRID (math: full float and data storage: half float) mode. One could change the mode to GPU_FLOAT16 (math: half float and data storage: half float) using –gpu_mode option.
adb shell
export SNPE_TARGET_ARCH=arm-android-clang6.0
export LD_LIBRARY_PATH=$LD_LIBRARY_PATH:/data/local/tmp/snpeexample/$SNPE_TARGET_ARCH/lib
export PATH=$PATH:/data/local/tmp/snpeexample/$SNPE_TARGET_ARCH/bin
cd /data/local/tmp/alexnet
snpe-net-run --container bvlc_alexnet.dlc --input_list target_raw_list.txt --use_gpu
exit
Pull the output into an output_android_gpu directory.
adb pull /data/local/tmp/alexnet/output output_android_gpu
Again, we can run the interpret script to see the classification results.
python3 scripts/show_alexnet_classifications.py -i data/target_raw_list.txt \
                                               -o output_android_gpu/ \
                                               -l data/ilsvrc_2012_labels.txt
The output should look like the following, showing classification results for all the images.
Classification results
cropped/trash_bin.raw     0.948242 412 ashcan, trash can, garbage can, wastebin, ash bin,
                                       ash-bin, ashbin, dustbin, trash barrel, trash bin
cropped/plastic_cup.raw   0.747559 647 measuring cup
cropped/chairs.raw        0.363770 831 studio couch, day bed
cropped/notice_sign.raw   0.720215 458 brass, memorial tablet, plaque
Review the output for the classification results.
Classification results are identical to the run with CPU runtime, but there are differences in the probabilities associated with the output labels due to floating point precision differences.