Prerequisites
- The SNPE SDK has been set up following the SNPE Setup chapter.
- The Tutorials Setup has been completed.
Introduction
This tutorial walks through the process of integrating the SNPE and snpe-platform-validator Java APIs within an Android application.
The SNPE and Platform Validator Java APIs are made available as an Android Archive (AAR) file which application developers include as a dependency of their applications.
Gradle project dependency
In case both the archives are required in a project, "pickFirst" need to be used in gradle to avoid library conflicts.
Platform Validator Java API Overview
Once the optional dependency of platformform validator is added, the Platform Validator classes under the com.qualcomm.qti.platformvalidator package will be available in the application classpath.
All applications will first create an object of Platform Validator with required runtime and then use that object to call validation APIs as described below.
Using Platform Validator
SNPE Java API Overview
Once the dependency is added, the SNPE classes under the com.qualcomm.qti.snpe package will be available in the application classpath.
Most applications will follow the following pattern while using a neural network:
- Select the neural network model and runtime target
- Create one or more input tensor(s)
- Populate one or more input tensor(s) with the network input(s)
- Forward propagate the input tensor(s) through the network
- Process the network output tensor(s)
The sections below describe how to implement each step described above.
Configuring a Neural Network
The code excerpt below illustrates how to configure and build a neural network using the JAVA APIs.
Multiple ways to load a model
The SDK currently supports loading a model from a java.io.File within the Android device or from an java.io.FileInputStream.
Creating an Input Tensor
The code excerpt below illustrates how to create an input tensor and fill it with the input data.
Notes about tensors
- Reuse of input tensors
Developers are encouraged to re-use the same input tensor instance across multiple calls to NeuralNetwork.execute(..). Tensors are memory bound types and the effect of creating new instances for every execute call may have an impact in the application responsiveness. - Batch write to tensor
Tensors are backed by native memory and writing multiple values at once, if possible, will reduce the overhead of crossing the Java and Native boundaries.
Propagate Input Tensors Through the Network
The excerpt of code below shows how to propagate input tensors through the neural network.
Process the Neural Network Output
The excerpt of code below shows how to read the output tensor of an output layer.
Release Input and Output Tensors
Tensors are encouraged to be reused to reduce the application overhead. However, once the application no longer needs the input and/or output tensors, it is highly recommended to call release() on them to release native resources. This is particularly important for multi-threaded applications.
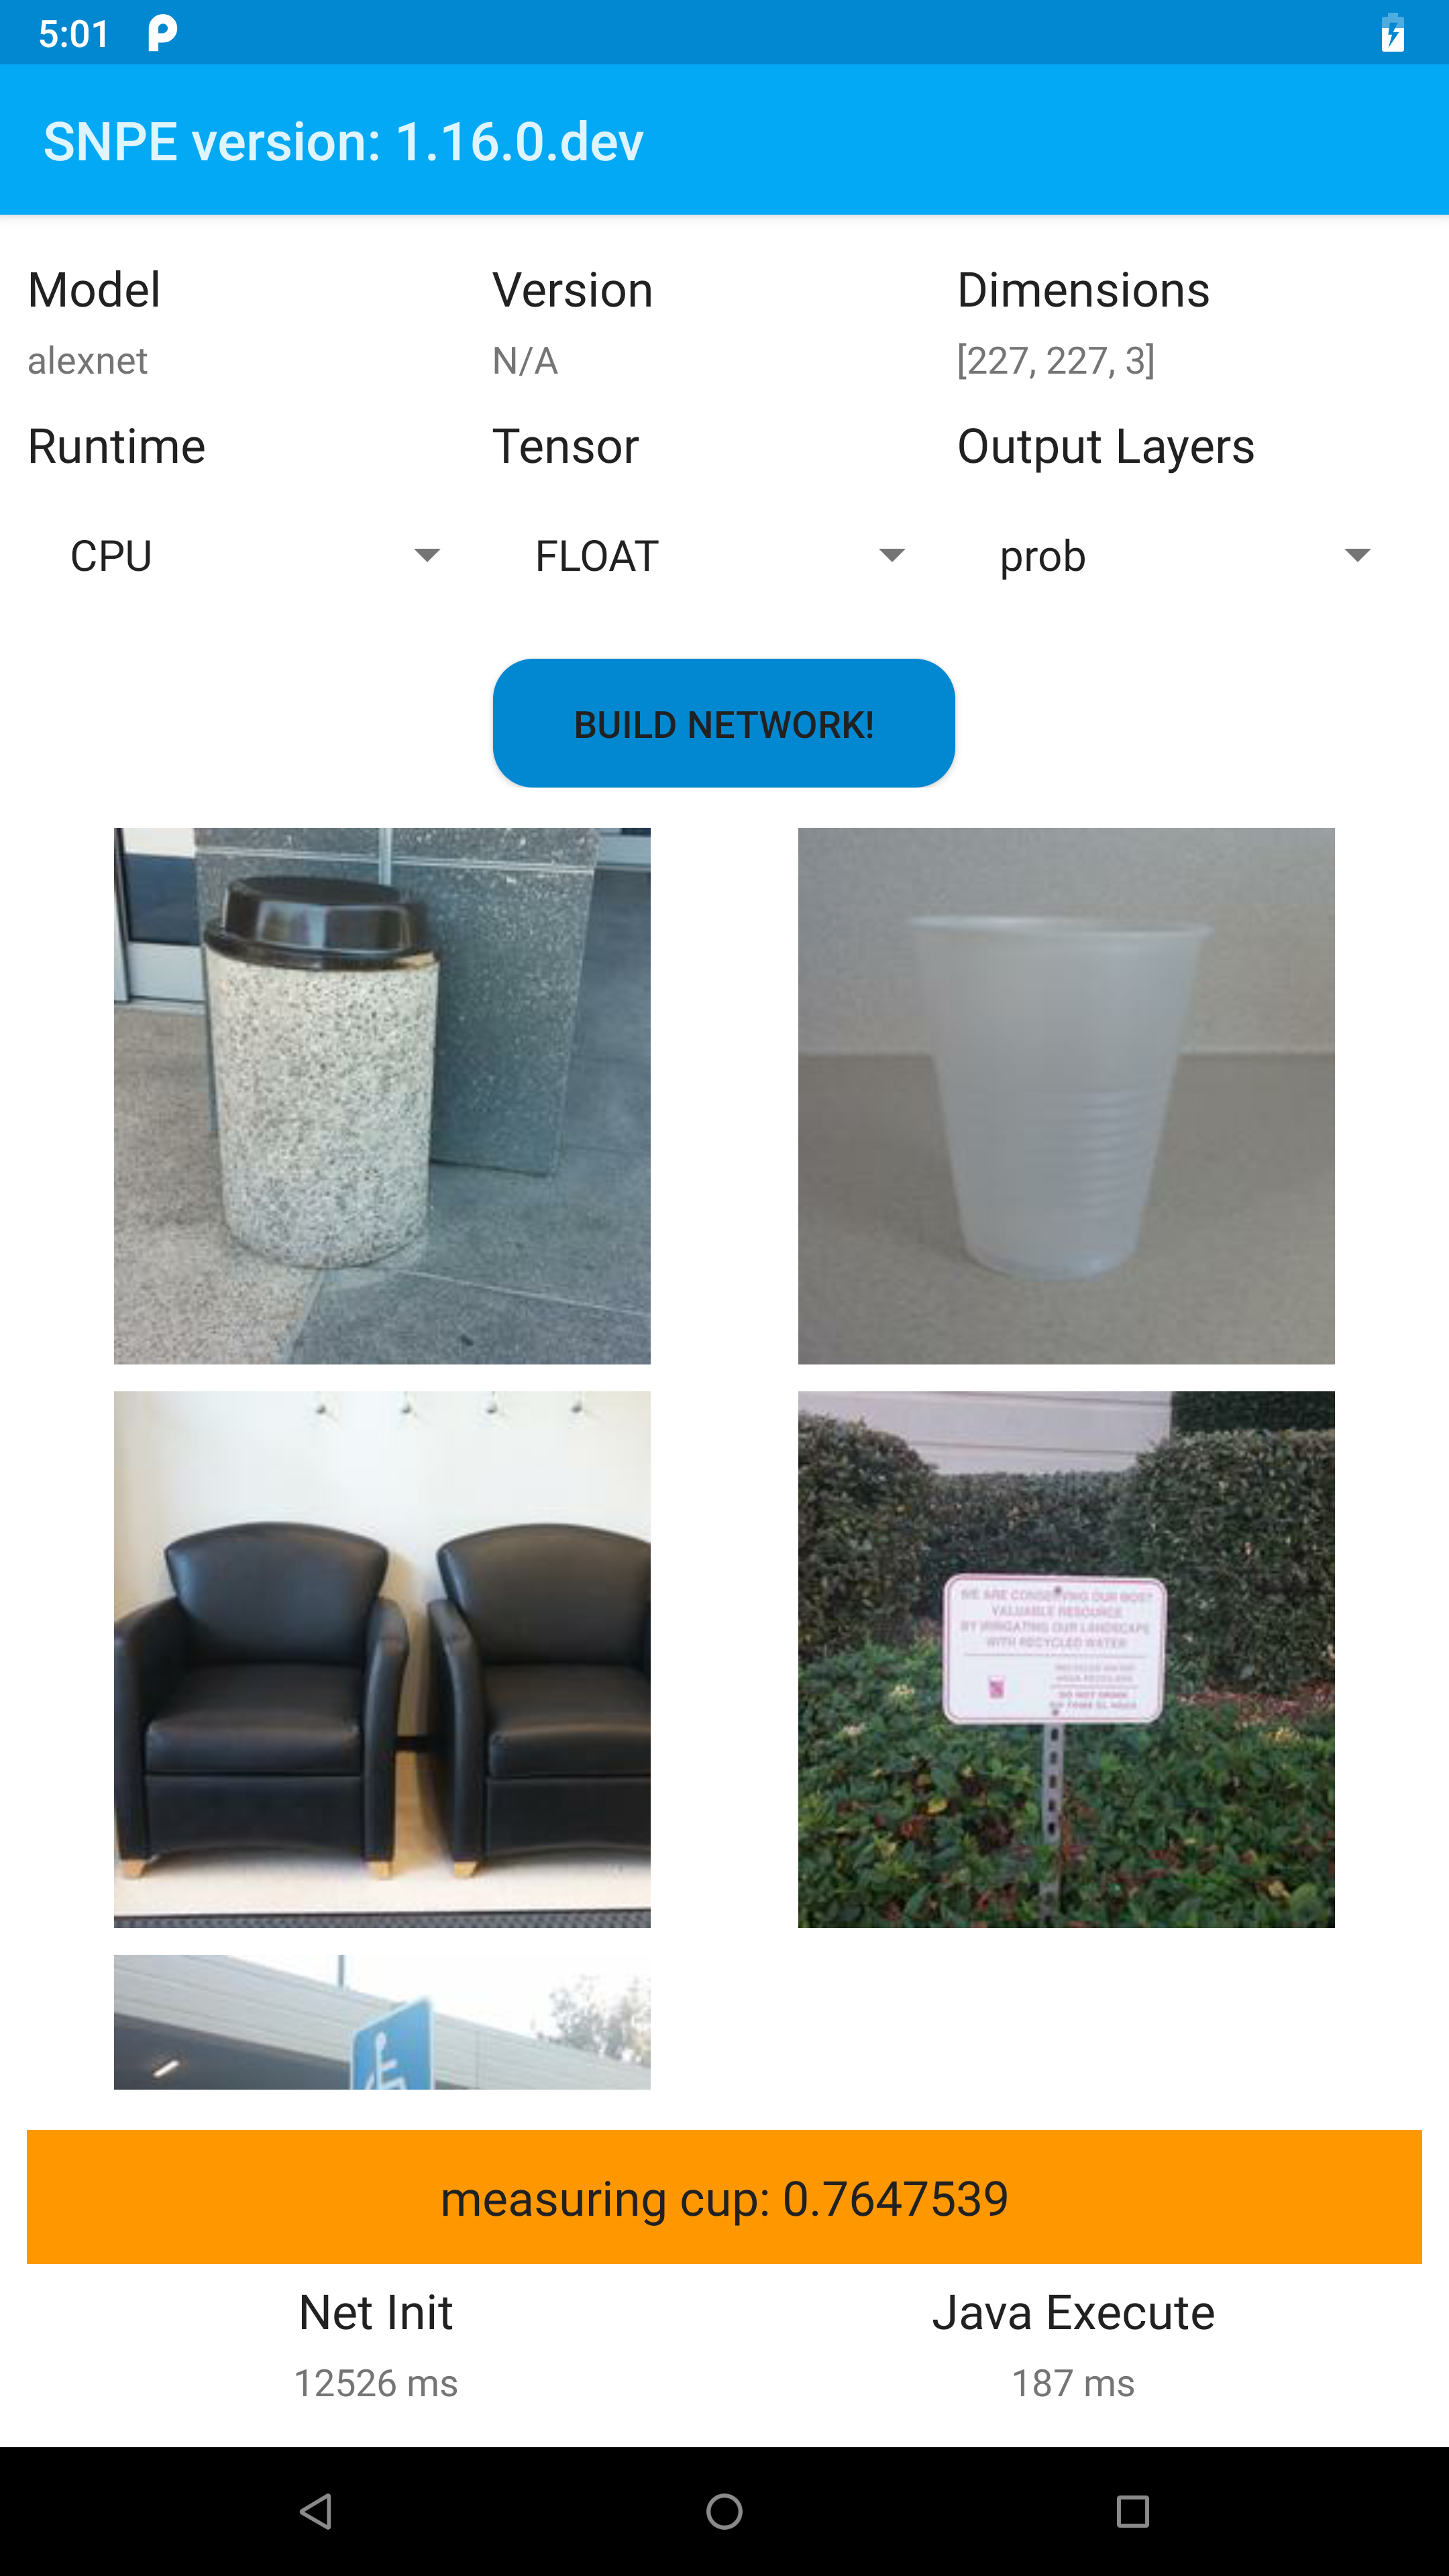
Android Sample Application
The SNPE Android SDK includes a sample application that showcases the SDK features. The application source code is in:
- $SNPE_ROOT/examples/android/image-classifiers
Here is a screenshot of the sample:
Note that SNPE provides the following AAR file which include necessary binaries:
- snpe-release.aar: Native binaries compiled with clang using libc++ STL
Please set environment variable SNPE_AAR to this AAR file.
To build this sample, include the SNPE SDK AAR as described above and build with the following commands.
Note:
- To build the sample, import the network model and sample images by invoking the setup_models.sh script as described above.
- If building produces the error gradle build failure due to "SDK location not found", set the environment variable ANDROID_HOME to point to your sdk location.
- Building the sample code with gradle requires java 8.
- The unsigned PD switch in the app can only be set/unset once when the model is loaded. On returning back to the menu screen and changing the option might result in unexpected behaviour.
- Running networks with UDO on a specific runtime requires UDO packages for the corresponding runtime to be pushed on the device (Run setup_inceptionv3.sh). On running a UDO network without UDO package may result in unexpected behaviour
After the build successfully completes, the output APK can be found in the application build folder:
- $SNPE_ROOT/examples/android/image-classifiers/app/build/outputs/apk